Create a Spring Boot project
Use Spring Initializr to config and create a “Web project”.
Choose Project Management Tools, Language, Spring Boot version (DO NOT choose SNAPSHOT), and fill in Project Metadata (Group/Artifact, Name, Description, Package name, Packaging and Java version).
Click ADD DEPENDENCIES and choose the dependencies you need.
Below is an example of mine.
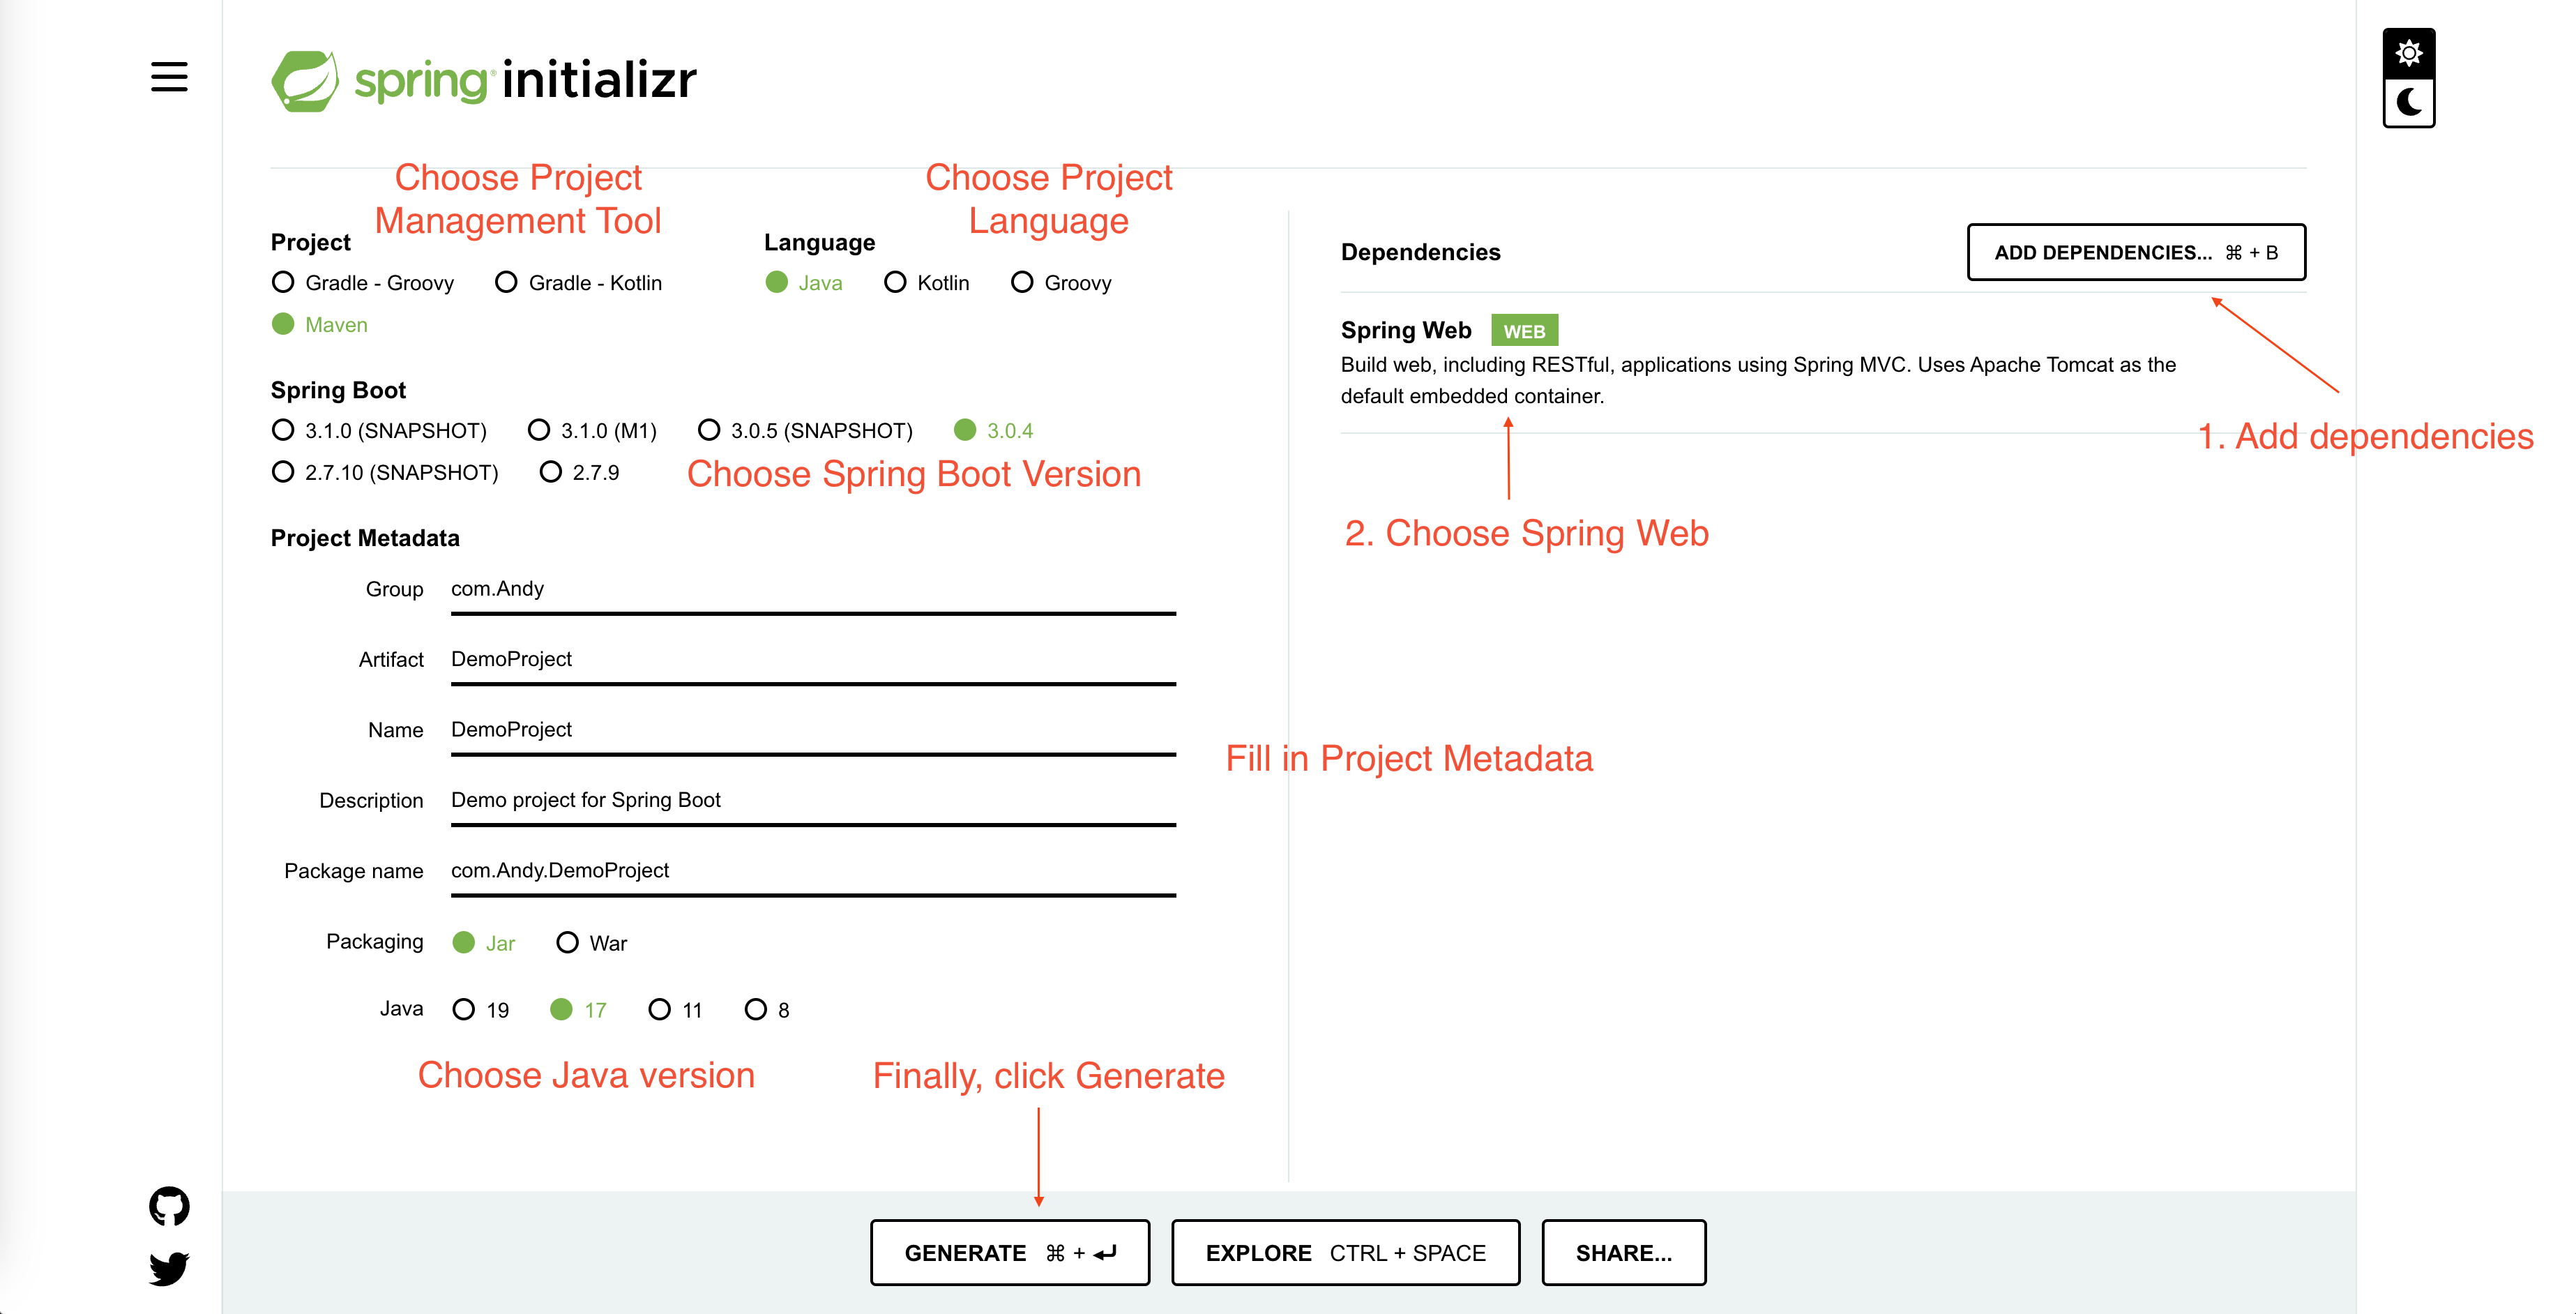
Click GENERATE, it will download a ZIP file of a web application with the configuration you choose.
Unzip the file and open the folder in your IDE. Here I use IntelliJ IDEA.
Modify the code in
src/main/java/YourGroupName/YourProjectNameDemoProject.java1
2
3
4
5
6
7
8
9
10
11
12
13
14
15
16
17
18package com.example.demo;
import org.springframework.boot.SpringApplication;
import org.springframework.boot.autoconfigure.SpringBootApplication;
import org.springframework.web.bind.annotation.GetMapping;
import org.springframework.web.bind.annotation.RequestParam;
import org.springframework.web.bind.annotation.RestController;
public class DemoApplication {
public static void main(String[] args) {
SpringApplication.run(DemoApplication.class, args);
}
public String hello( String name) {
return String.format("Hello %s!", name);
}
}The
@RestControllerannotation tells Spring that this code describes an endpoint that should be made available over the web. The@GetMapping(“/hello”)tells Spring to use ourhello()method to answer requests that get sent to thehttp://localhost:8080/helloaddress. Finally, the@RequestParamis telling Spring to expect a name value in the request, but if it’s not there, it will use the word"World"by default.Run the project
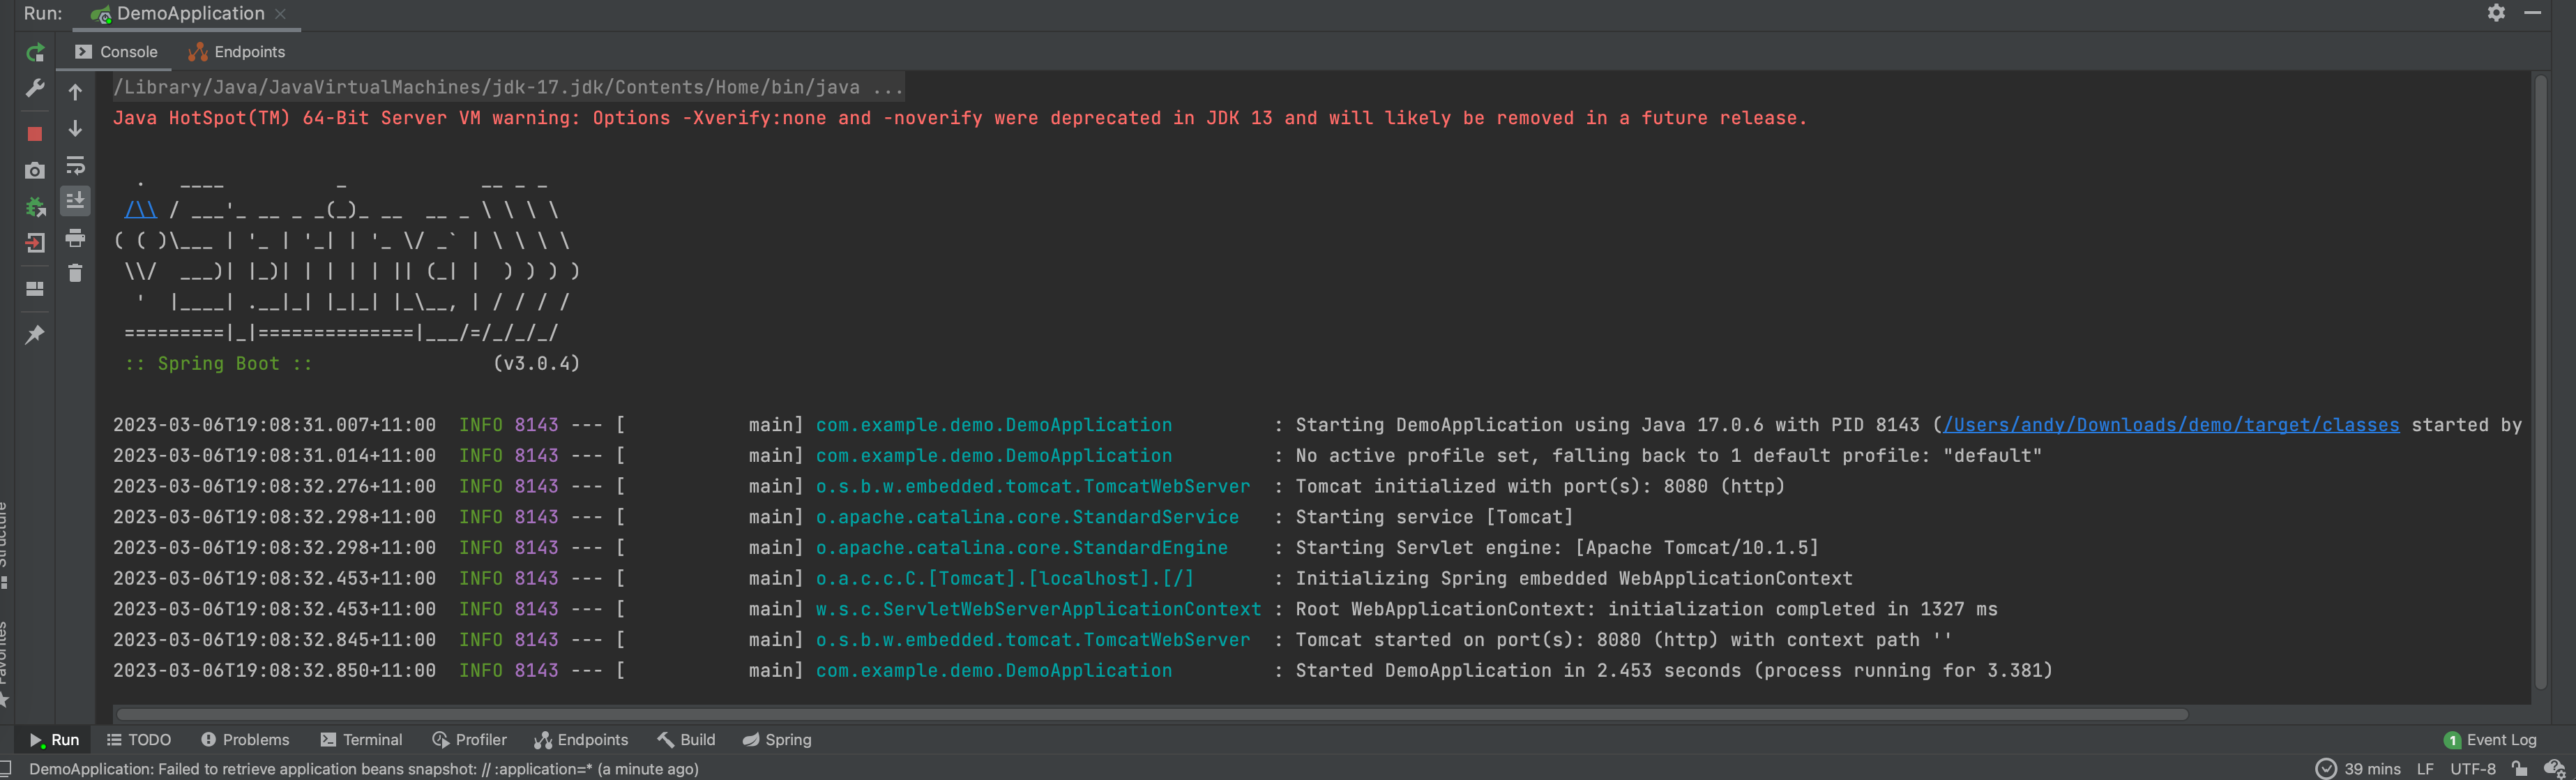
Open the browser, and enter http://localhost:8080/hello, you should see Hello World now.
If you add ?name=YourName to the end of the URL, you will see Hello World being replaced by Hello YourName on the page now.

Reference
About this Post
This post is written by Andy, licensed under CC BY-NC 4.0.